Pixel Information
The purpose of a pixel is to track events such as conversions. Pixels usually come in the form of an iFrame, image, or postback, and Maximus supports each of those three types.

How does this pixel work with Maximus?
After a user sees and clicks an ad creative on a top-tier publisher, the user is redirected to the native network. The native network redirects to Maximus. Maximus then redirects the user to the campaign's weighted link. The page that loads is the offer page where the user can order a product. The confirmation page after ordering contains a pixel that tells Maximus that a conversion has happened.
What happens behind the scenes?
When a user reaches Maximus after clicking a Native ad, an ID is assigned to the click. This click id is funneled along to the weighted link, either in the tracking token {clickid} or automatically as s5=click_id&max_cid=clickid.
The click id is a critical component to the reliability of the pixel. If the click id can be passed, there is a 100% chance of the sales tracking back to the click. If the click id cannot be passed back, Maximus tries to identify the user via a cookie. This is less reliable as it is possible for the user to clear their cookie settings, use different devices, or browse privately.
As mentioned previously, there are three pixel types that Maximus supports: iFrame, image, and postback. iFrame and image pixels both load an invisible 1x1 pixel on the confirmation page.
Postback pixels are the most reliable if all systems can pass the click id throughout the entire sales funnel. Postback pixels do not require anything to be loaded on the user’s browser and are supported by most third party tracking systems.
To access the pixel, this can be done by clicking Pixel Set Up when viewing the campaign details for a campaign.
CPA campaigns and CPC campaigns vary but function similarly. Click here to read our CPA vs CPC documentation.
White Label Domain
With Maximus you can use our pixel, or a custom domain pixel to track conversions. You can use the custom domain pixel along with the click_id for the most accurate tracking of your conversions. If you cannot pass the Maximus Click ID through your funnel, the custom domain pixel is available for Pro Plan users. Using the custom domain pixel without a click ID can allow you to track conversions in a situation where you have no access or control over editing presells or other parts of the sales funnel.
Pixels and Postbacks
iFrame pixel
When placing a pixel on your confirmation (Thank You) page, #s5# should be replace with the Maximus Click ID that has been passed through the funnel, and #price# should be a number equal to the value of the conversion.
If you're placing a pixel inside an external system, you can use your system's token that is tracking the click id. For the payout value, you can either use a number or use your system's token for the payout of a conversion.
<iframe src="https://rpptrk.com/p/?cid=#s5#&payout=#price#" height="1" width="1"></iframe>
An example iframe pixel once values are passed through in this case looks like:
<iframe src="https://rpptrk.com/p/?cid=b4a922a6-9fc1-4ecb-ba90-f2fde1490aa0&payout=50" height="1" width="1"></iframe>
Image Pixel
If you're unable to use an iFrame pixel, you can substitute it with an image pixel. The formatting is almost identical, but the pixel changes just slightly:
<img src="https://rpptrk.com/p/?cid=#s5#&payout=#price#" height="1" width="1">
Remember to replace #s5# and #payout# - you will need to have the Maximus click ID populate where #s5# is, and the payout is the numerical value of your conversion payout.
Postbacks
Using postbacks in an external system works just like setting a pixel there - replace #s5# with the token you're tracking our click ID in, and #price# with the token for payout (or use a static payout value). For more information, check out the sections below for the most commonly used systems and follow our guides on setting them up.
Postbacks can be sent directly to the same URL:
https://rpptrk.com/p/?cid=#s5#&payout=#price#
White Label Domain Pixel
If you do not want to place a pixel for each campaign, you are unable to pass click id through the funnel, or you would prefer to use a custom domain and a click id, you can use a custom domain pixel. This feature is available for Pro Plan users only.
White Label Domain Pixel & Postback
An example of the custom domain pixel will look like the following:
<iframe src="https://customdomain.com/p/?payout=#price#" height="1" width="1"></iframe>
Please remember to replace the #price# with whatever macro token your tracking system or offer network uses for a payout.
An example iframe pixel in this case looks like:
<iframe src="https://customdomain.com/p/?payout=40" height="1" width="1"></iframe>
By not including the click id (cid), Maximus will determine which click belongs to the conversion by using the user's last click. Maximus must have access to the web user's browser in order to find the click, so postback or server-to-server pixels will not work.
Maximus will look at the last click the user made prior to the pixel firing to determine the click. It is possible that a small percentage of users will click Campaign A and then Campaign B, but convert on Campaign A’s sales funnel. In this case, Maximus will see this as a conversion to Campaign B. To eliminate this possibility, you can still pass a link id or, even better, pass a click id for the most reliable conversion tracking.
Using a postback is as simple as replacing the rpptrk.com domain with your new custom domain, and follows the same setup as a normal postback using tokens for the click id and payout.
https://customdomain.com/p/?cid=#s5#&payout=#price#
Running Listicles or Multiple Conversions in a Funnel
Some campaigns have more than a single offer as a part of them, whether you use a third party system to rotate offers, have a listicle or landing page with multiple offers, or multiple sales in a funnel with upsells or addons. In situations like this, the step pixel needs to be used to track multiple sales with the same click id.
Click here to learn more about the step pixel.
Weighted Links
In Maximus when you place your landing page(s) in the Weighted Links section, you'll need to add to them depending on how your funnel looks.
With a Presell/Landing Page
If you're using a landing page, you may not need to modify anything as Maximus automatically adds s5={clickid} and max_cid={clickid} to the end of every link when it redirects to your landing page.
In a situation like this, you can use your Landing Page Builder's built in function of grabbing parameters from the URL and appending them to links on the page.
If you do not use a builder product like Wizzi for your landing pages, you'll need someone on your tech/development team to scrape the URL for the click ID and append it to links on your page.
The end goal is to have the Maximus click ID pass all the way through the funnel to the place where it needs to be used in the pixel or postback. If you use a network like Cake, Everflow, or HasOffers, you'll most likely have those links on your landing page. Make sure that the click ID is being added based on the guides below so it can fire inside of the tracking section.
If you do not use a system like Cake, Everflow, or HasOffers, you'll need to pass the Maximus click ID through the funnel to the thank you/confirmation page so the pixel here can fire with that click ID value.
With a Tracker
If you use a tracker, chances are the campaign link itself is placed directly in Maximus as the weighted link. In this case, follow the guides below for common trackers like Voluum and ThriveTracker to have them properly track and fire conversions.
Landing Page Builder Setup
Different LP Builders will have options to allow you to pass either the parameters from the URL as they are on to your links, or specify how you want to append to links. If you're using one which passes exclusively only what the URL has, edit Maximus' weighted link(s) to use the correct parameter, like
?paramhere={clickid}Wizzi
Wizzi is an incredible LP Builder that allows you to specify how you want to pass values to the links on your landing page. When inside of your LP you're building, click on Settings in the top right.
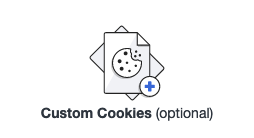
From here, the section that needs editing is Custom Cookies (optional)
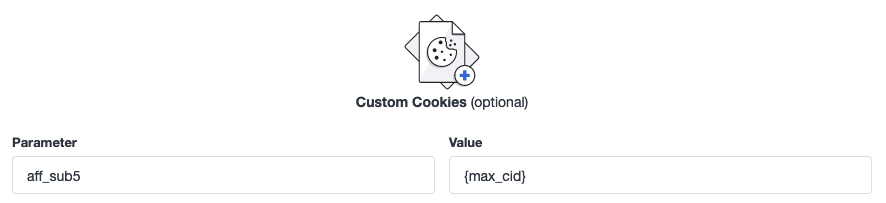
In the Parameter section, add the parameter you'd like to add to your links that will be usable by your tracking system/affiliate network. In the Value section, add the corresponding Maximus token parameter inside of two brackets {}. In the case of tracking, we'll want to use max_cid here as Maximus appends this to all traffic going to the weighted links
In this example, the parameter is set up for HasOffers, where we recommend using aff_sub5 to track the Maximus click ID.
Confirm that you see the value passing to your tracking system/network by following the Preview Offer button on the side menu of the Campaign Details page.
Tracking System Set Up
Everflow
To set up tracking inside Everflow, navigate to your offer by using the left side menu and select Manage. On the offer page, navigate to the Postbacks menu option.

In the first section, Conversion, click on the Add Postback button.
Fill out the relevant information for Affiliate, and everything else should populate for the offer correctly. For Delivery Method select either HTML or Postback. We recommend postback but you can use whichever method you prefer.
The Postback should look like:
https://rpptrk.com/p/?cid={sub5}&payout={payout_amount}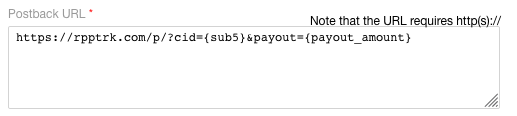
If you want to use Pixel HTML, it should look like:
<iframe src="https://rpptrk.com/p/?cid={sub5}&payout={payout_amount}" height="1" width="1"></iframe>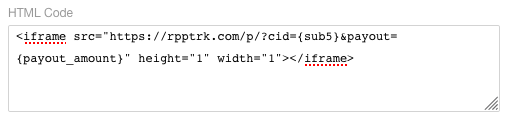
Append to your Weighted Link(s)
Depending on which subX variable you use, you can change the above pixel/postback. Using sub5 as an example, append the following to your weighted link in Maximus:
sub5={clickid}Cake
When using Cake as your tracking system, Maximus automatically sends the required click id to Cake via the s5 token. On the campaign card, the postback pixel as well as the iFrame pixel can be placed for extra reliability.
The Pixel HTML should be:
<iframe src="https://rpptrk.com/p/?cid=#s5#&payout=#price#" height="1" width="1"></iframe>
The Postback URL should be:
https://rpptrk.com/p/?cid=#s5#&payout=#price#
Append to your Weighted Link(s)
You do not need to append anything to your weighted links as Maximus automatically adds s5={clickid} to your links.
Voluum
It is recommended to set up a new traffic source when using Voluum. This new traffic source will map the Maximus link to your Voluum instance. Offers are then built to utilize the {varX} tracking macro to pass to the campaign’s actual landing page. Voluum will then be able to fire a postback pixel based on the {varX} macro as well.
There are some cases where the variables may not work and we recommend trying the externalid value if possible.
In this situation, the Maximus traffic source postback should look like:
https://rpptrk.com/p/?cid={externalid}&payout={payout}Add the parameter as externalid and the placeholder as {clickid} for the external id advanced parameter.
Below is a visual of the traffic source set up in Voluum. The traffic source postback URL should be the postback url from your Maximus campaigns.
The max_cid is passed to all Maximus links. When setting up the traffic source, use max_cid in an available “var” field if you are using varX. If you use varX, set up an advanced parameter with the name as "Maximus Click ID", the parameter as var1, and the token as {clickid}.
Also, if you are passing the click id through Voluum to another system to fire conversions, your offer setup should also pass the click id as {varX} or {externalid}.
Append to your Weighted Link(s)
Depending on which varX variable you use (or externalid), you can change the above pixel/postback. Using externalid as an example, append the following to your weighted link in Maximus. Voluum will automatically append any advanced parameters to the campaign links it generates for that traffic source, so you may not need to add these-
externalid={clickid}If you use varX (var1 for example) add this to your weighted link:
var1={clickid}ThriveTracker
Set up a new Traffic Source in ThriveTracker in order to use Thrive with Maximus.

During setup, you'll need to use the External ID variable in order to track conversions back to Maximus. To learn about adding Traffic Sources, click here to read Thrive's documentation.
You'll need to add a source name that is unique, we recommend using "Maximus" and setting the source abbreviation to "MAX".
In the Post-Back Pixel #1 section, make sure the dropdown is set to URL Post-Back and enter the following:
https://rpptrk.com/p/?cid={externalid}&payout={amount}Scroll down just a little to the section which shows parameters.
Next to External ID you'll see two boxes you can enter information in. Set the Parameter to
externalid
And set the Placeholder to
{clickid}When you create a campaign in Thrive, set Maximus as the traffic source. You can also clone an existing campaign, and edit the traffic source and set it to Maximus.
Copy the campaign URL from ThriveTracker and use this as your Weighted Link inside of Maximus on your campaign.
HitPath
In HitPath, access the Pixels card from campaign actions. The format should be set to Postback and the postback URL is:
https://rpptrk.com/p/?cid=xxc1xx&payout=xxpayoutxx
Append to your Weighted Link(s)
c1={clickid}HasOffers
Setting up the postback pixel is done from the campaign screen. The code type should be set to Postback URL and the code is
https://rpptrk.com/p/?cid={aff_sub5}&payout={payout}Append to your Weighted Link(s)
aff_sub5={clickid}Custom Website
Maximus will send a click id along in any URL parameter required. This can be set when adding the weighted link. The pixels can be placed directly on the confirmation/thank you pages and this pixel can be accessed when clicking ‘Pixel Set up’ on the campaign details page.
There are a number of simple ways to accept/ pass click ids to increase reliability. It is also reasonable to use the cookie functionality of Maximus to ease the setup process.
Shopify
To track sales onto your Shopify integrated site, add the following to the end of your landing page URL:
?ref=maximus
In Shopify, go to Settings > Checkout and in the Order processing section, find the Additional scripts text box:
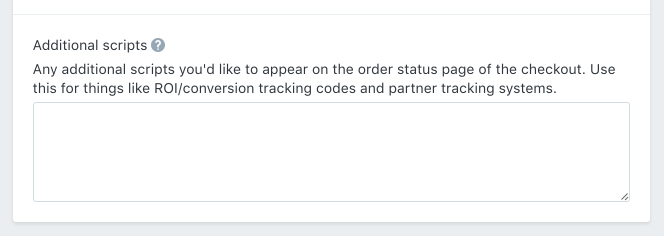
Paste the following into this text box and save the changes:
{% if landing_site_ref == 'maximus' %}
<img src="https://rpptrk.com/p/?payout={{ total_price | money_without_currency }}&step={{ order_number }}" height="1" width="1">
{% endif %}
Troubleshooting
Nearly all pixel problems are caused by a missed step in the process. Please be sure to verify all of the setup processes have been followed.
▸ Voluum: Verify the traffic source and offers share the same {varX} token
▸ Cake: Verify click id is being looked for in s5
▸ HitPath: Verify that the click id is being looked for in the C2 values and that the weighted link is passing on the click id.
▸ HasOffers: Verify that click id is being looked for in aff_sub5 in both postback pixel and the weighted link setup.
There are also tools such as http://redirectdirective.com or http://wheregoes.com that can help you trace redirect problems.
We're always here to help and we're here to assist you in any way we can with tracking. Let us know in our LiveChat or send us an email at support@maximusx.com with any questions, or we can even jump on a quick call to iron out any issues.